
HIIIIIIIIII
As I'm cramming my way through finals (3 done, 3 to go), here's a little look for you guys.
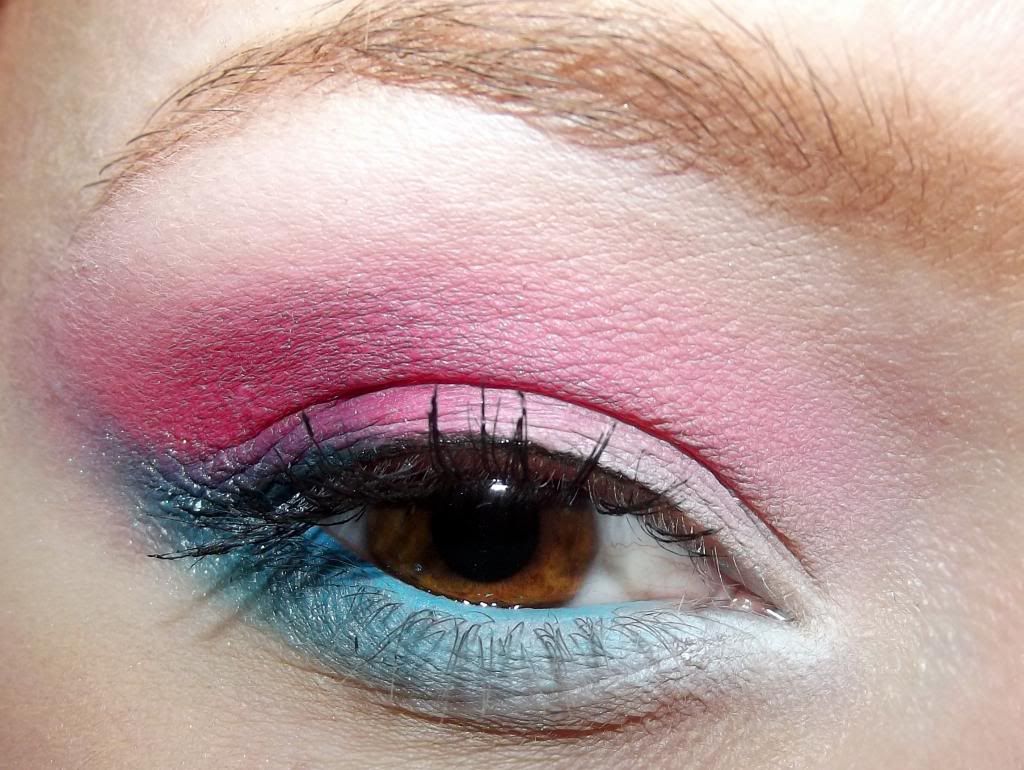
I started putting my foundation on while watching Frozen, and suddenly got this immense urge to do a look inspired by Elsa's castle. It is my absolute favorite thing in the movie, it's so beautiful and ICY. Originally I'd planned to do a fresh, bright look for spring, and luckily for me, it ended up working as double. ^~^
Here's a step by step on how to do this look.

1. Start off with a foundation-ready face. It's super important to have a clear face for bright eye looks, otherwise it'll just distract the attention from the eyes.

2. Contour under cheekbones, chin, temples and nose.
Highlight bridge of nose, forehead, top of cheekbones and cupid's bow.
Blush on cheekbones and towards the temples.
These are important steps to define the face and bring some life into it after tuning it out with heavy foundation.
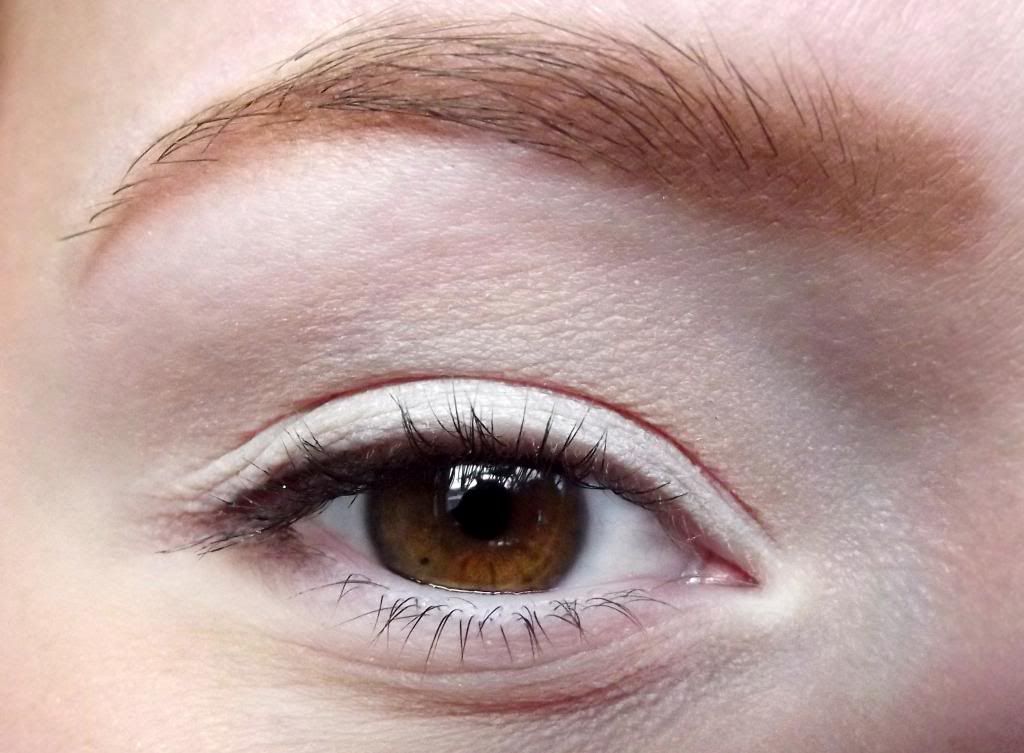
3. Next, super important step (for every eye look you ever do!!), eye primer / a base for your eye shadow to stick to and stay vibrant.
I also filled my eyebrows in a straighter shape.
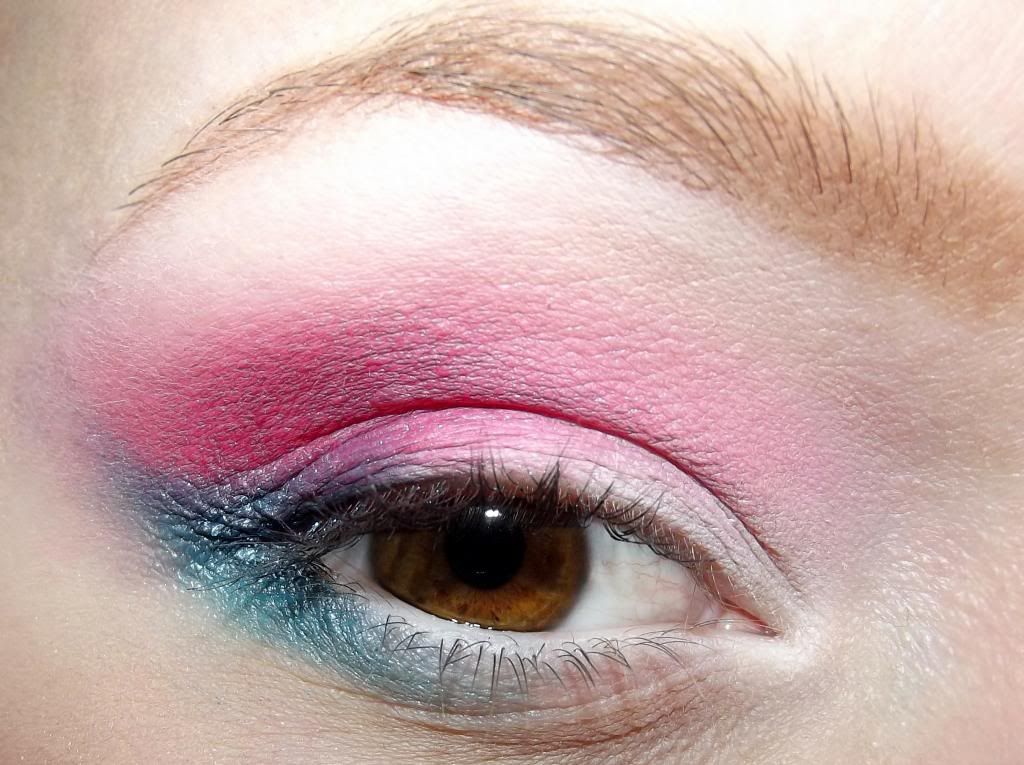
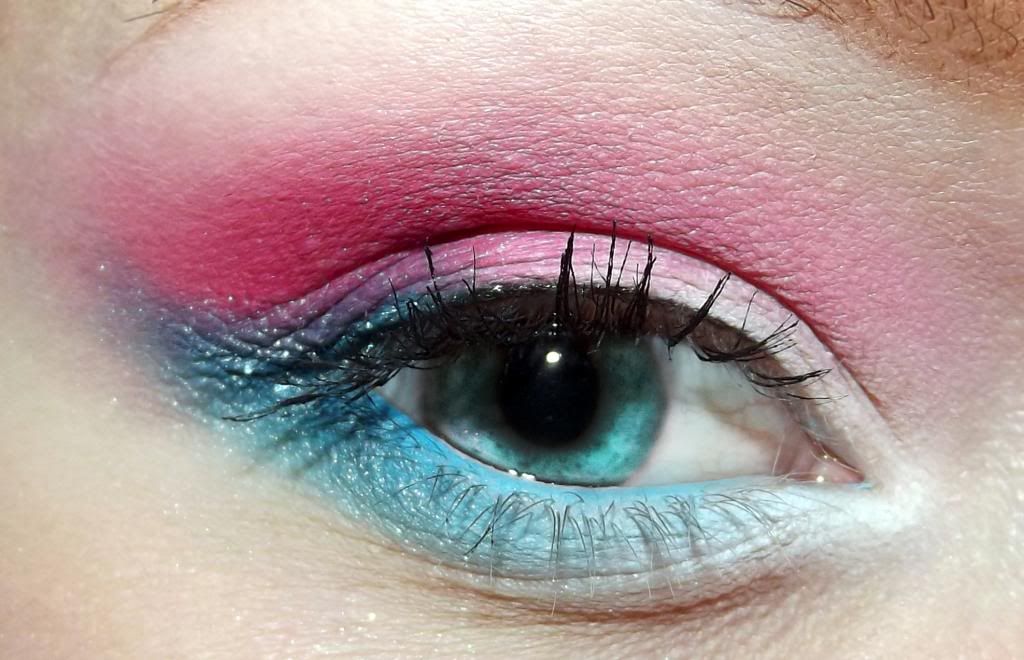
4. Adding eye shadow, first a fresh pink in the outer corner and blended lightly all over.
Then a matte white on the inner part of the eyelid.
Lastly building up a shimmery/glittery/amazing aqua blue under the outer corner and a bit on top, winging it out.
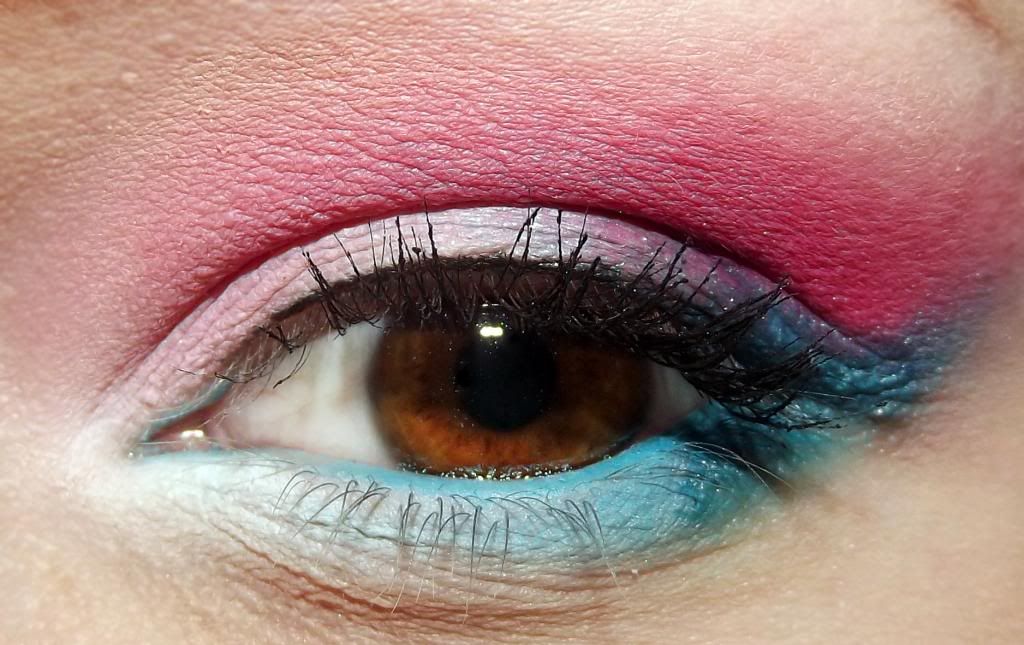
5. Last step would be to apply eyeliner, mascara and optionally, false lashes.
I used a matte light blue on my waterline (don't use eye shadows on your waterline if you have sensitive eyes!) and decided to skip the lower lashes entirely.
That makes it look fresher and a bit more innocent.
And you're done!
(yes, the sun had given up on me by the time I was done so that's why the pictures change in light)

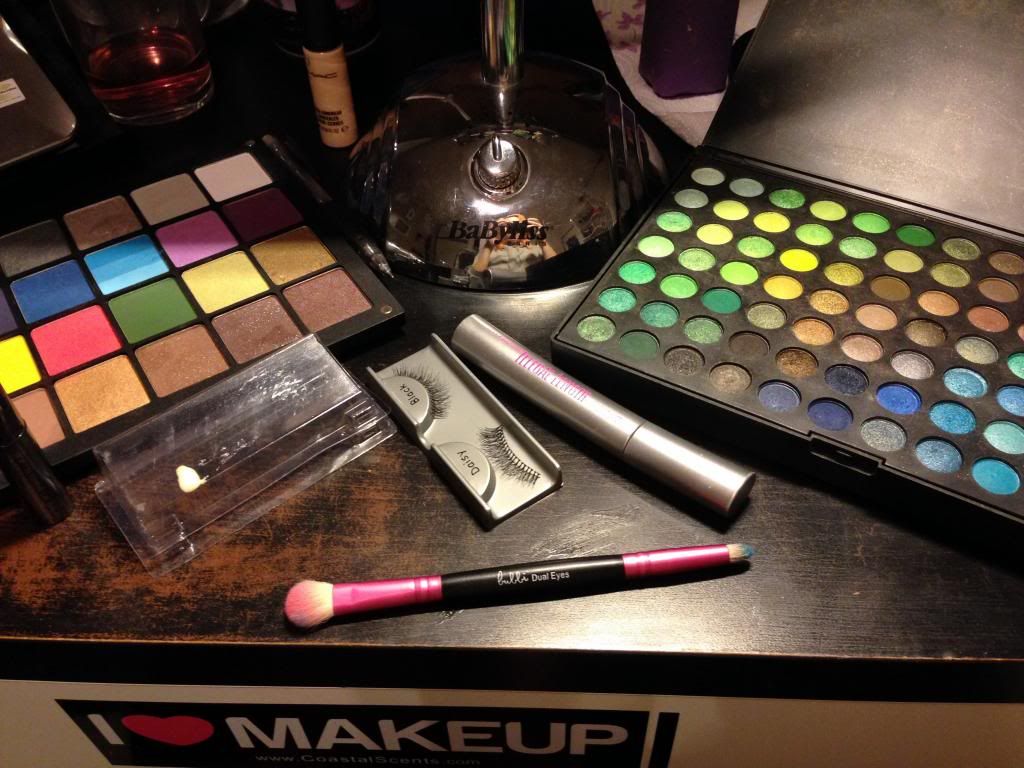
Things used:
Hope you like it!
Until next time
:]
Ooh, very pretty!
ReplyDelete